Linux Router with Patched Kernel, IPTABLES with Layer7 plugin.
1- Patching Kernel, IPTABLES with Layer7 plugin:
Introduction:-
The Layer7 is an excellent plugin for the kernel and iptables, where it is possible to the blockade of programmes directly on the layer of application without the need for blocking doors, which is often impractical.
See L7-filter Supported Protocols: http://l7-filter.sourceforge.net/protocols
Installation:-
I used Ubuntu Dapper Drake Ubuntu 6.06.2 LTS to do this so you must do the following as i did.
After Finishing Your System installation:- you need to install the following packages
sudo apt-get update
sudo apt-get dist-upgrade
sudo apt-get install build-essential bzip2 gzip unzip libncurses5-dev kernel-package
After having all the above packages installed now we will download the following
cd /usr/src
sudo wget http://www.kernel.org/pub/linux/kernel/v2.6/linux-2.6.19.tar.gz
sudo wget http://www.netfilter.org/projects/iptables/files/iptables-1.3.7.tar.bz2
sudo wget http://ufpr.dl.sourceforge.net/sourceforge/l7-filter/netfilter-layer7-v2.9.tar.gz
sudo wget http://puzzle.dl.sourceforge.net/sourceforge/l7-filter/l7-protocols-2008-04-23.tar.gz
Configuration:-
Now then; preparing to patch and compile the kernel, let’s extract the sources:
sudo tar xvzf linux-2.6.19.tar.gz
sudo tar xvjf iptables-1.3.7.tar.bz2
sudo tar xvzf netfilter-layer7-v2.9.tar.gz
sudo tar xvzf l7-protocols-2008-04-23.tar.gz
Now create a link to the kernel directory.
sudo ln -s /usr/src/linux-2.6.19 /usr/src/linux
Now go to the installation directory:
sudo make oldconfig
Now let’s apply the layer7 patch in the kernel
cd /usr/src/linux
patch -p1 /usr/src/netfilter-layer7-v2.9/kernel-2.6.18-2.6.19-layer7-2.9.patch
Now the kernel is ready to be configured.
make menuconfig
The screen of the kernel configuration will be displayed. You should follow this steps:
Networking —> Networking options —> [*] Network packet filtering (replaces ipchains) —> Core Netfilter Configuration
—> Netfilter Xtables support (required for ip_tables)
Enable the option with M Netfilter Xtables support.
Enable the option with M Netfilter Xtables support.
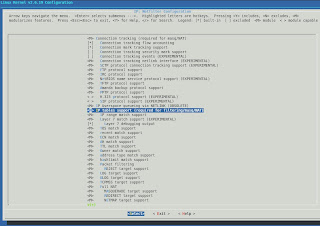
Then choose the following options See screenshot for more information here.
Now Go to :-
Networking —> Networking options —> [*] Network packet filtering (replaces ipchains) —> IP: Netfilter Configuration
—> IP tables support (required for filtering / masq / NTA) —>
and activate:
Layer 7 match support (TRIAL)
[*] Layer 7 debugging output [*] Layer 7 debugging output
Then choose the following options See screenshot for more information here.

After enabling as above, follow selecting Exit and until they are asked if you want to save the new configuration of the kernel, select YES and to save.
Ready! The kernel is set to Layer7, just now compile and install.
Now we will compile & build a Debian package of the modified kernel just type this command:-
make-kpkg -initrd kernel_image
Now you have to be patience, because it depending on your machine’s processor.
After finishing the compilation return to
cd /usr/src
it’s now created
"kernel-image-2.6.19_10.00.Custom_i386.deb"
This file is the kernel of which we will have to install. use the command
dpkg -i kernel-image-2.6.19_10.00.Custom_i386.deb
The new kernel is ready, Now we apply the IPTABLES patch & install it by default your system will has a version of iptables so you must remove it before you install the patched version.
sudo apt-get remove --purge iptables
cd /usr/src/iptables-1.3.7
sudo patch -p1 /usr/src/netfilter-layer7-v2.9/iptables-layer7-2.9.patch
sudo chmod +x extensions/.layer7-test
sudo make KERNEL_DIR/usr/src/linux
sudo make install KERNEL_DIR/usr/src/linux
The implementation and installation of the patch in iptables is finished. Now we will have to install the l7 protocolos.
cd /usr/src/l7-protocols-2008-04-23
sudo make install
Everything is ready, Now you can restart, select the new kernel at boot.
at the start we need to do a test, we must enable the module of iptables and apply a rule.
if you want to allow a host to use one of the protocols you will be blocking just before you block the protocol allow him by doing the following:
sudo iptables -A FORWARD -s 10.0.0.2 -m layer7 --l7proto msnmessenger -j ACCEPT
sudo iptables -A FORWARD -s 10.0.0.0/24 -m layer7 --l7proto msnmessenger -j DROP
Now you have blocked the connection to the MSN messenger to the whole network expect the host using “10.0.0.2” it can’t connect now.
2- Configuring a Linux Router:
In this document we will use a high speed connections to the internet result in an Ethernet connection to the gateway. thus the gateway is required to possess two Ethernet network interface cards (NICs), one for the connection to the private internal network and the other one to the public internet, in this guide the Ethernet names are “eth0 & eth1”
let’s assume this settings and you can change it as of your configuration.
Take a backup of your old configuration “always do this”
sudo cp /etc/network/interfaces /etc/network/interfaces.bak
sudo vi /etc/network/interfaces
erase any exiting settings then; put the following
# The loopback network interface
auto lo
iface lo inet loopback

# The primary network interface connected directly via cable, DSL, T1
auto eth0
iface eth0 inet static
address 192.168.1.161
netmask 255.255.255.0
gateway 192.168.1.250

# The secondary network interface connected directly to the internal network
auto eth1
iface eth1 inet static
address 10.0.0.161
netmask 255.255.255.0
Now let’s enable the two (NICs)
sudo /etc/init.d/networking restart
Now let’s setup IP Forwarding and Masquerading:
Enables packet forwarding by kernel
sudo echo 1 > /proc/sys/net/ipv4/ip_forward
sudo echo net.ipv4.ip_forward=1 >> /etc/sysctl.conf
sudo iptables -t nat -A POSTROUTING -o eth0 -j MASQUERADE
Now connect the second NIC “eth1” to a switch and connect your internal network to this switch.
3- Saving iptables:-
If you were to reboot your machine right now, your iptables configuration would disappear. Rather than type this each time you reboot, however, you can save the configuration, and have it start up automatically. To save the configuration, you can use iptables-save and iptables-restore.
Let’s assume we applied the following rules
sudo iptables -t nat -A POSTROUTING -o eth0 -j MASQUERADE
sudo iptables -A FORWARD -s 10.0.0.180 -m layer7 --l7proto msnmessenger -j ACCEPT
sudo iptables -A FORWARD -s 10.0.0.0/24 -m layer7 --l7proto msnmessenger -j DROP
So to prevent losing this rules if rebooting we will use iptables-save to write them to a script ;-
sudo iptables-save /etc/iptables.rules
Now we have to apply this script when the machine boot-up;-
sudo vi /etc/network/interfaces
then add the following after your network configuration;
pre-up iptables-restore /etc/iptables.rules
post-down iptables-save -c /etc/iptables.rules


